三目並べデザイン
さぁ三目並べの作成だ。ConstraintLayoutレイアウトのプロフェッショナルとなった私は(ウソです)あっというまに画面定義する予定だ。
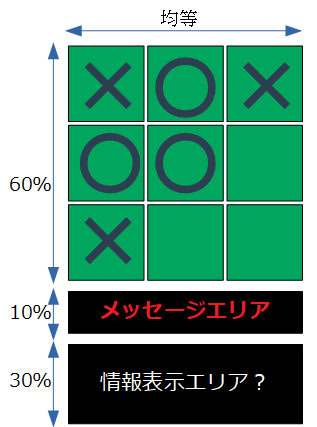
三目並べの画面イメージは次の通りだ。
上部は三目並べのプレー画面だ。そしてナビゲーションメッセージを2段目に表示する。3段目の情報エリアに何を表示するか、まだ考えはまとまっていないが将来五目並べとか十目並べとかに対応し何か表示しよーと思案している。
えっ、・・・ダサイ?…知ってます。。。デザインの才能ってやつが微塵もないのだ。ここで画伯才能もご紹介したいところだが次に進む。
Guidelineの出番だ
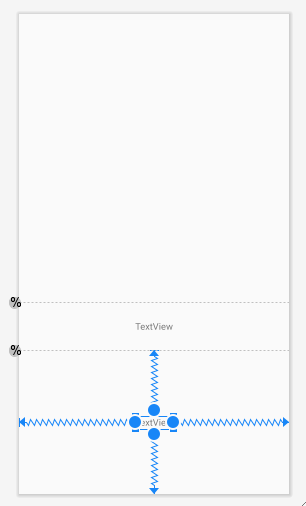
前回の学習効果があるので、ここはさくっと定義していくつもりだが、何か悪戦苦闘しそうな予感が漂っている…。まずは新規ファイル「ticktacktoo.xml」を作成し、Guideline部品で横に二つのライン作成する。そして、60%、70%(60+10)で配置する。
textView配置
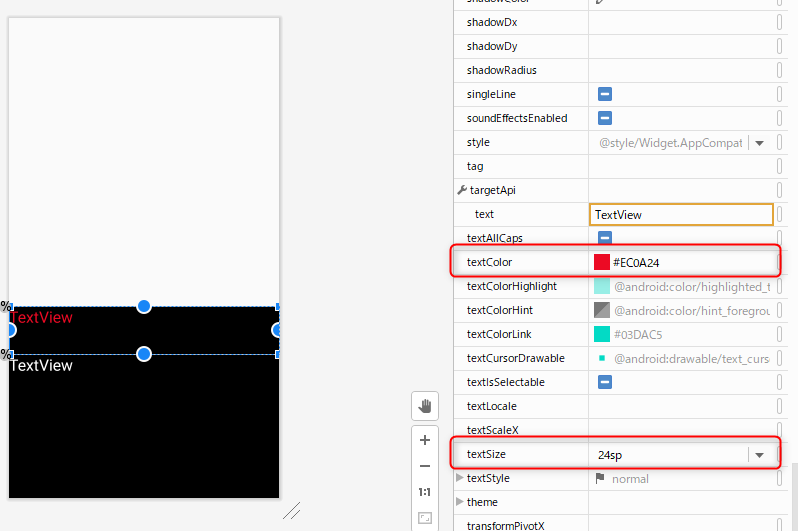
1段目のプレー画面は後回しにし2段目のナビゲーションメッセージ、3段目の情報エリアにTextView部品を配置する。そして四辺の○をGuidelineや画面隅にドラックする。
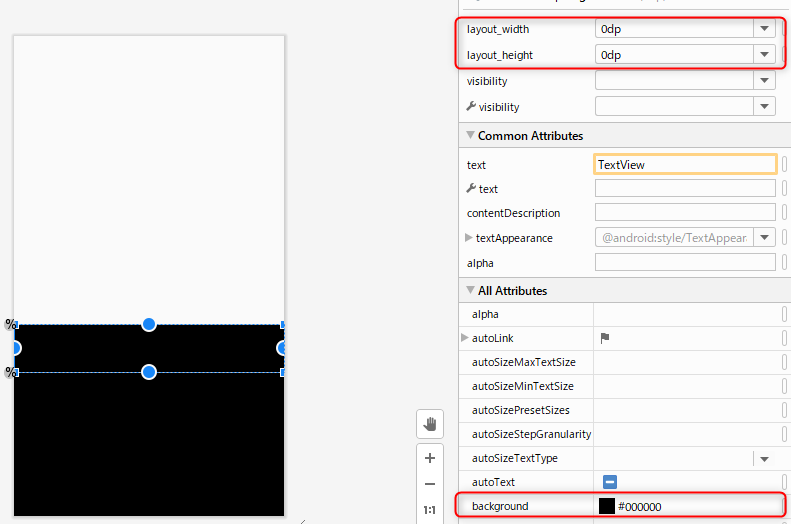
部品を最大限大きくするため属性「layout_width」、「layout_height」を0dpにする。次に背景色を黒色にするために「background」を#000000に設定。
さらに文字色をそれぞれ赤、白色にするため「textColor」属性に#EC0A24、#FFFFFFを設定。フォントサイズ「textSize」属性を変更し24spにする。
マージン
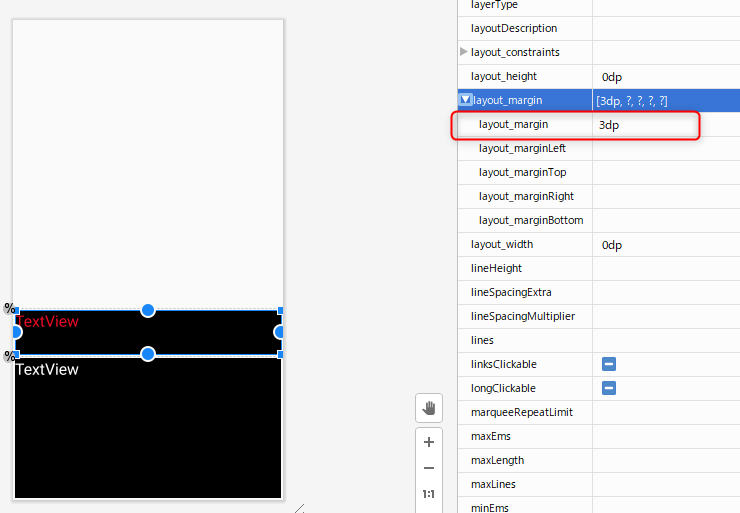
下段がほぼ完成したが、部品間にマージンを設定する。「layout_margin」属性に3dpを設定する。
えっ?dpは使わないじゃなかった?と思われるかもしれない。dpは解像度に応じてスケーリングしてくれるが端末により誤差が発生する。このため極力使用を避けてきた。しかし値が小さければ誤差も小さい、そこでマージンとかパディングで値が小さい場合は使用しても問題ないと考えている(多分)
ここまでのコードを掲載する。
|
1 2 3 4 5 6 7 8 9 10 11 12 13 14 15 16 17 18 19 20 21 22 23 24 25 26 27 28 29 30 31 32 33 34 35 36 37 38 39 40 41 42 43 44 45 46 47 48 49 50 51 52 53 54 55 56 57 58 59 60 61 62 63 64 65 66 67 68 69 70 71 72 73 |
<?xml version="1.0" encoding="utf-8"?> <androidx.constraintlayout.widget.ConstraintLayout xmlns:android="http://schemas.android.com/apk/res/android" xmlns:app="http://schemas.android.com/apk/res-auto" xmlns:tools="http://schemas.android.com/tools" android:layout_width="match_parent" android:layout_height="match_parent"> <androidx.constraintlayout.widget.Guideline android:id="@+id/guideline1" android:layout_width="wrap_content" android:layout_height="wrap_content" android:orientation="horizontal" app:layout_constraintGuide_percent="0.6" /> <androidx.constraintlayout.widget.Guideline android:id="@+id/guideline2" android:layout_width="wrap_content" android:layout_height="wrap_content" android:orientation="horizontal" app:layout_constraintGuide_percent="0.7" /> <TextView android:id="@+id/textView3" android:layout_width="0dp" android:layout_height="0dp" android:layout_margin="3dp" android:background="#000000" android:text="TextView" android:textColor="#EC0A24" android:textSize="24sp" app:layout_constraintBottom_toTopOf="@+id/guideline2" app:layout_constraintEnd_toEndOf="parent" app:layout_constraintStart_toStartOf="parent" app:layout_constraintTop_toTopOf="@+id/guideline1" /> <TextView android:id="@+id/textView4" android:layout_width="0dp" android:layout_height="0dp" android:layout_margin="3dp" android:background="#000000" android:text="TextView" android:textColor="#FFFFFF" android:textSize="24sp" app:layout_constraintBottom_toBottomOf="parent" app:layout_constraintEnd_toEndOf="parent" app:layout_constraintStart_toStartOf="parent" app:layout_constraintTop_toTopOf="@+id/guideline2" /> <TableLayout android:layout_width="0dp" android:layout_height="0dp" android:layout_margin="3dp" app:layout_constraintBottom_toTopOf="@+id/guideline1" app:layout_constraintEnd_toEndOf="parent" app:layout_constraintStart_toStartOf="parent" app:layout_constraintTop_toTopOf="parent"> <TableRow android:layout_width="match_parent" android:layout_height="match_parent" /> <TableRow android:layout_width="match_parent" android:layout_height="match_parent" /> <TableRow android:layout_width="match_parent" android:layout_height="match_parent" /> </TableLayout> </androidx.constraintlayout.widget.ConstraintLayout> |
上段のプレー画面を後回しにした。悩んでいる。ボタンなどを配置してChain機能を使えば簡単に配置できそうだ。けれど3×3のマス目としてプログラムでハンドリングするのが難しくならないか?ここはTabelLayoutの出番ではないか?

