部品を比率で配置
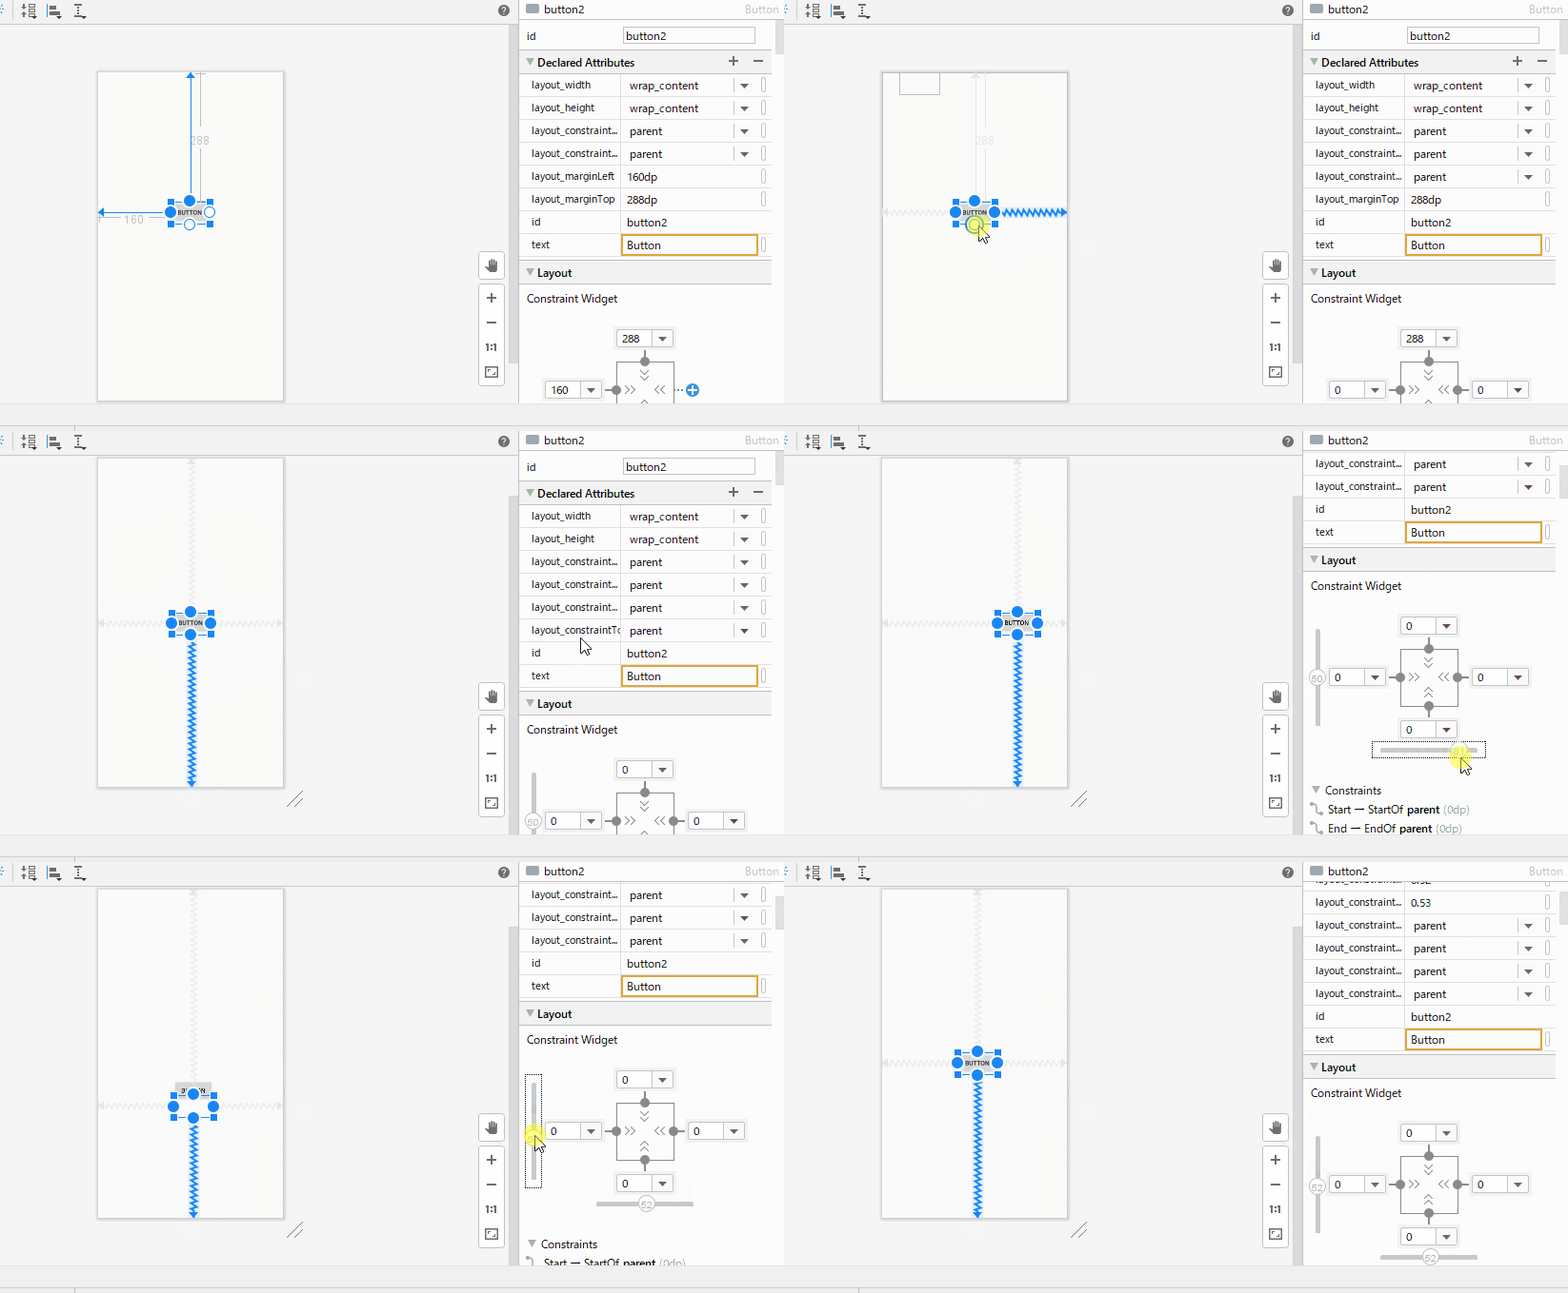
前回ConstraintLayoutレイアウトで部品を配置したが、dpの位置指定になってしまった。
比率指定にできないかと試したところ、上辺、左辺だけではなく下辺、右辺の○をドラックすることにより比率指定となった。
複数部品の配置
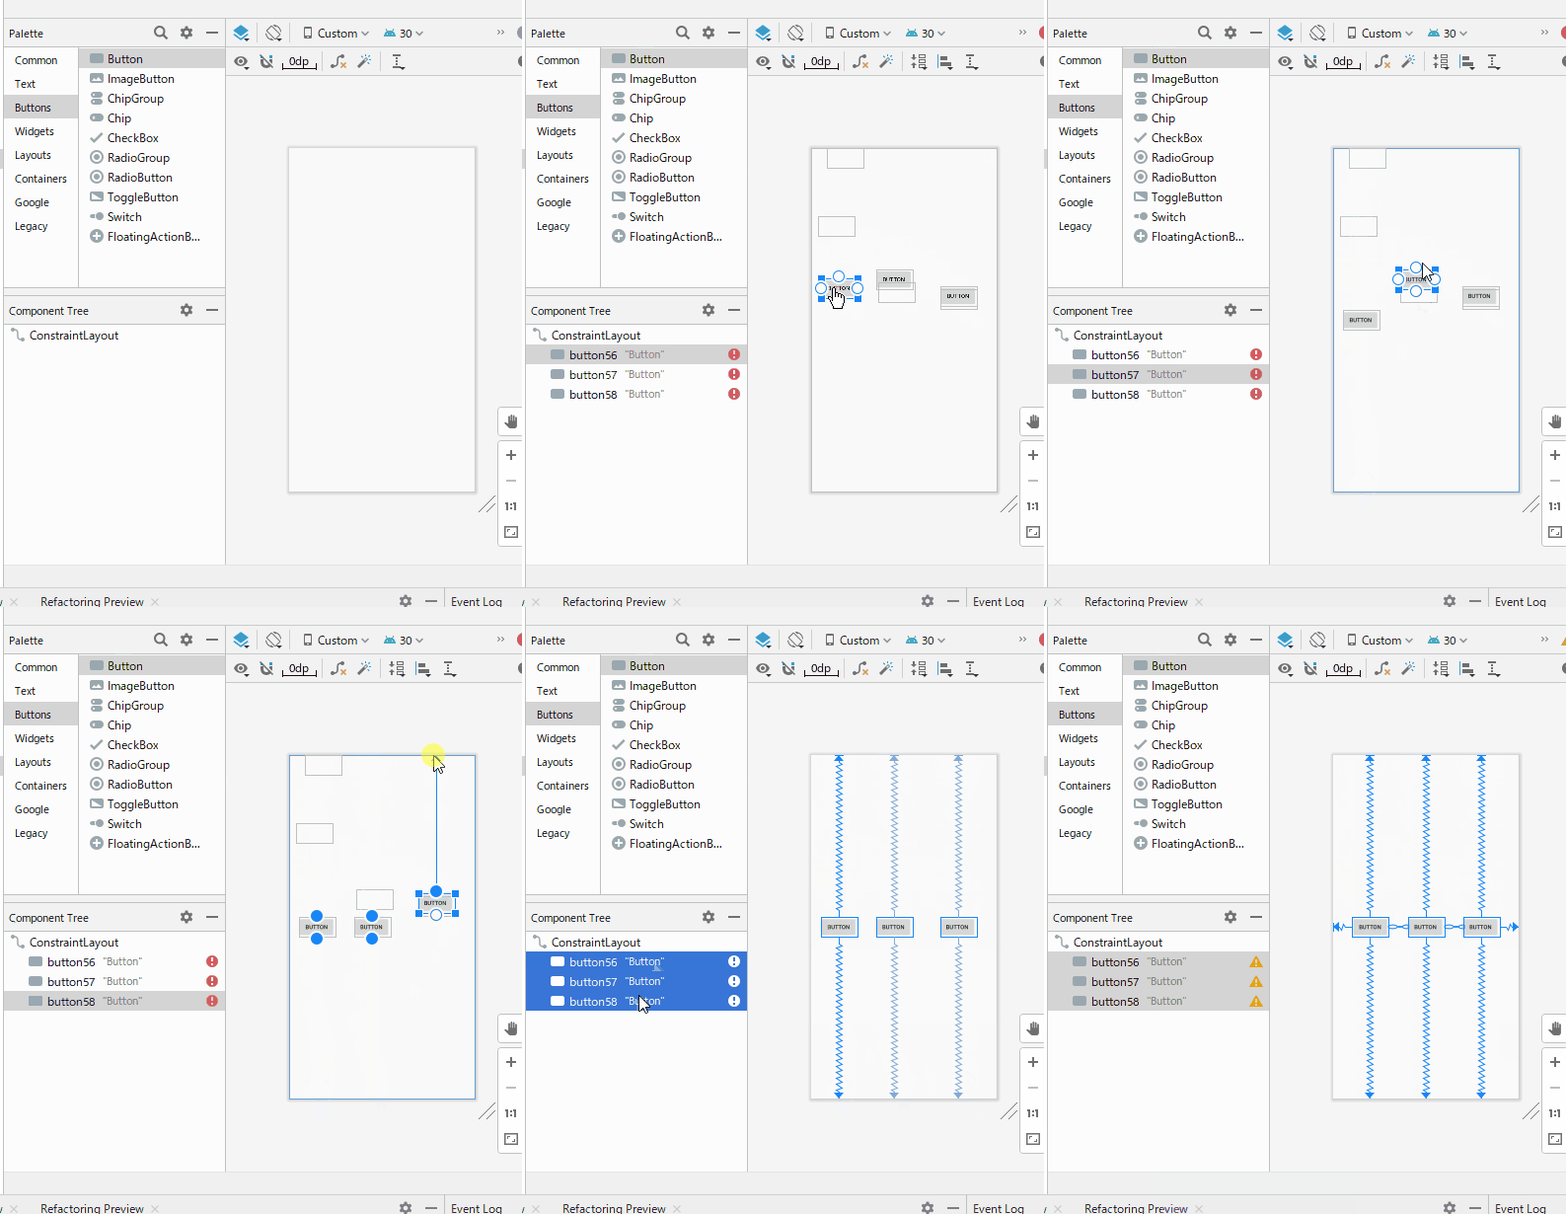
部品の比率配置ができたが、画面を構成する部品は複数あるはずだ。よって複数部品の配置を確認する。まず3部品配置し「Chain」機能により横並びにしてみる。
画面左上のPaletteからButtonを選択しプレビュー画面へドロップする。これを繰り返しボタンを3つ配置する。各部品を選択し上辺の○を画面上、下辺の○を画面下までドラックする。
Chain設定を行う。画面左下のComponent Treeから部品全てを選択し、マウス右クリック->Chians->Create Horizontal Chainを選択。これにより部品が横並びに均等配置される。
さらに比率で配置
横並びで均等比率で配置できたが均等でない場合もある。例えば左側ボタンのみ2倍大きいなどだ。これは部品に重み(weight)を付けると実現できる。
weightの設定はデザインモードからではやりずらいので、画面右上のCodeをクリックしコードで記述する。各部品の「android:layout_width」の値を”0dp”に、そしてweghtの属性「app:layout_constraintHorizontal_weight」を追加/設定していく。最初のボタンのみ2とし他のボタンを1にすることで最初のボタンが2倍の大きさになる。
|
1 2 3 4 5 6 7 8 9 10 11 12 13 14 15 16 17 18 19 20 21 22 23 24 25 26 27 28 29 30 31 32 33 34 35 36 37 38 39 40 41 42 43 |
<?xml version="1.0" encoding="utf-8"?> <androidx.constraintlayout.widget.ConstraintLayout xmlns:android="http://schemas.android.com/apk/res/android" xmlns:app="http://schemas.android.com/apk/res-auto" xmlns:tools="http://schemas.android.com/tools" android:layout_width="match_parent" android:layout_height="match_parent"> <Button android:id="@+id/button56" android:layout_width="0dp" android:layout_height="wrap_content" android:text="Button" app:layout_constraintBottom_toBottomOf="parent" app:layout_constraintEnd_toStartOf="@+id/button57" app:layout_constraintHorizontal_bias="0.5" app:layout_constraintStart_toStartOf="parent" app:layout_constraintHorizontal_weight="2" app:layout_constraintTop_toTopOf="parent" /> <Button android:id="@+id/button57" android:layout_width="0dp" android:layout_height="wrap_content" android:text="Button" app:layout_constraintBottom_toBottomOf="parent" app:layout_constraintEnd_toStartOf="@+id/button58" app:layout_constraintHorizontal_bias="0.5" app:layout_constraintStart_toEndOf="@+id/button56" app:layout_constraintHorizontal_weight="1" app:layout_constraintTop_toTopOf="parent" /> <Button android:id="@+id/button58" android:layout_width="0dp" android:layout_height="wrap_content" android:text="Button" app:layout_constraintBottom_toBottomOf="parent" app:layout_constraintEnd_toEndOf="parent" app:layout_constraintHorizontal_bias="0.5" app:layout_constraintStart_toEndOf="@+id/button57" app:layout_constraintHorizontal_weight="1" app:layout_constraintTop_toTopOf="parent" /> </androidx.constraintlayout.widget.ConstraintLayout> |
縦位置も比率で
複数部品を任意の比率で配置できたが、これでもまだ不満なところがある。それは縦位置に関して各部品がバラバラなのだ。
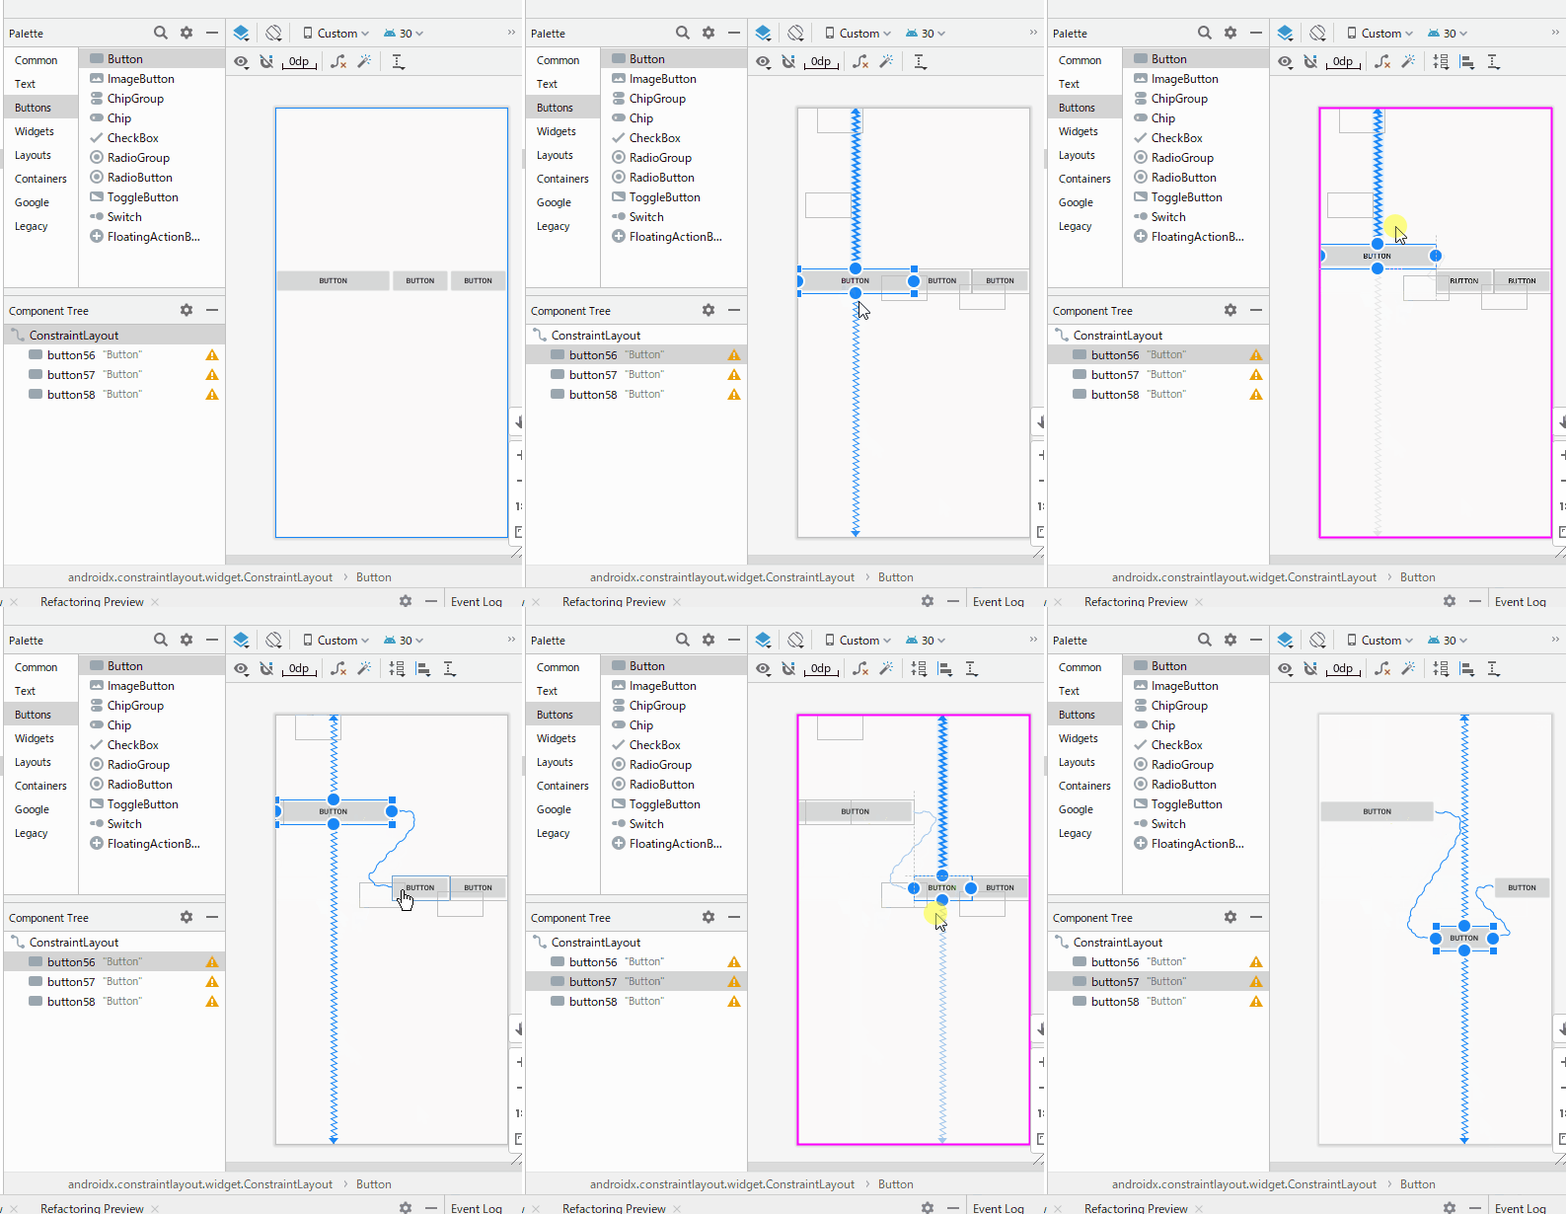
縦位置も各部品を特定比率で配置できたらいいのだが、これには色々な方法があるみたいだ。発見したのは「GuideLine」という部品だ。このGuideLineは応用ができそうなので、ここで試してみる。
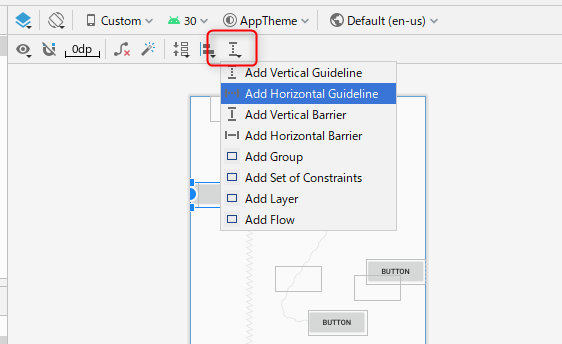
GuideLine部品を配置する。プレビュー画面の上にGuideLineアイコンをクリック->Add Horizontal GuideLineを選択。
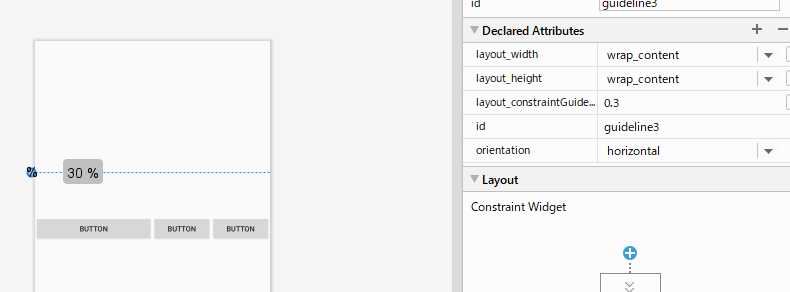
プレビュー画面に横線が表示される。選択すると上下に移動できる。この横線に対して各部品の上辺○をドラッグし制約項目とする。これでGuideLineを上下に移動すると各部品も移動する。
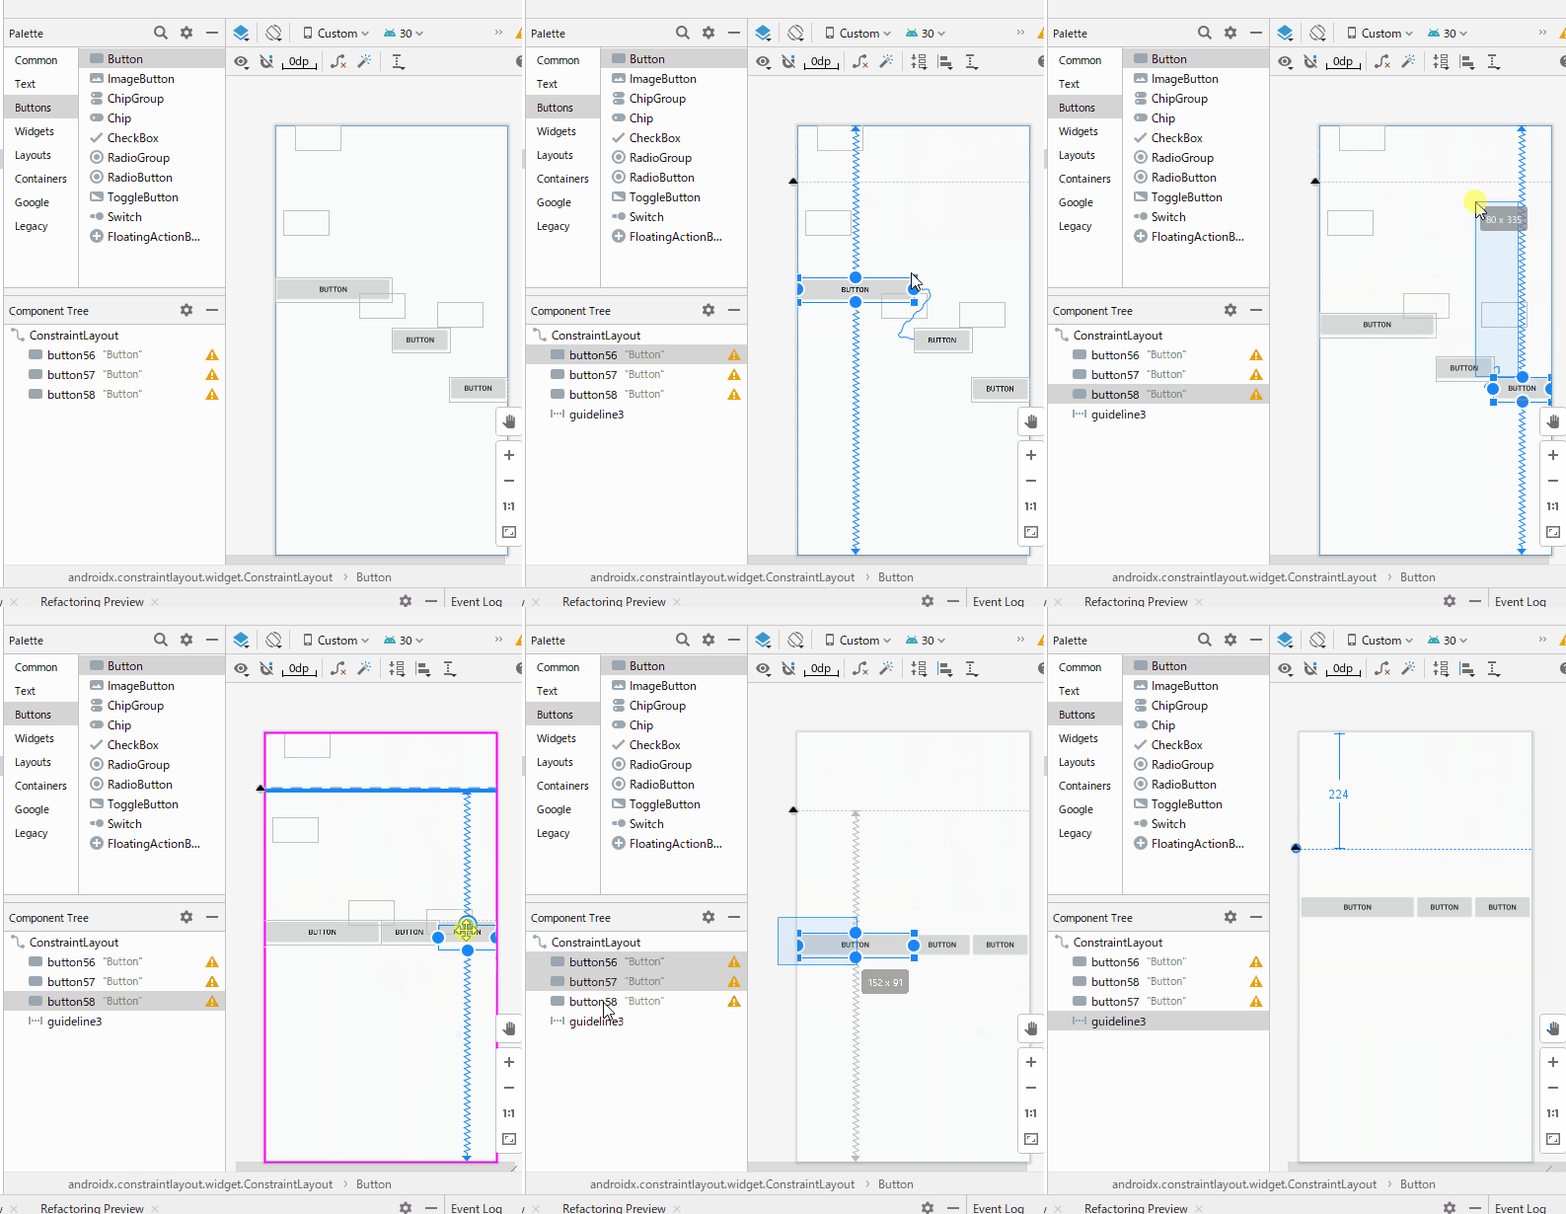
これで各部品が同一の縦比率で配置できた!と思ったがよくよく見るとこのGuideLine、縦位置がdpで配置されていた。
この縦位置を比率で指定したいところだ。これにはコードを変更する必要がある。画面右上のCodeをクリックしコード編集する。Guideline定義内の属性「app:layout_constraintGuide_begin」を削除し、代わりに「app:layout_constraintGuide_percent」属性を追加する。ここに比率を設定する。
|
1 2 3 4 5 6 |
<androidx.constraintlayout.widget.Guideline android:id="@+id/guideline3" android:layout_width="wrap_content" android:layout_height="wrap_content" android:orientation="horizontal" app:layout_constraintGuide_percent="0.3" /> |
横並びだけの確認だが、ChainやGuidelineを利用すれば自由に比率配置できそうだ。次回は縦配置を確認しながら応用的な配置に挑戦してみる。


